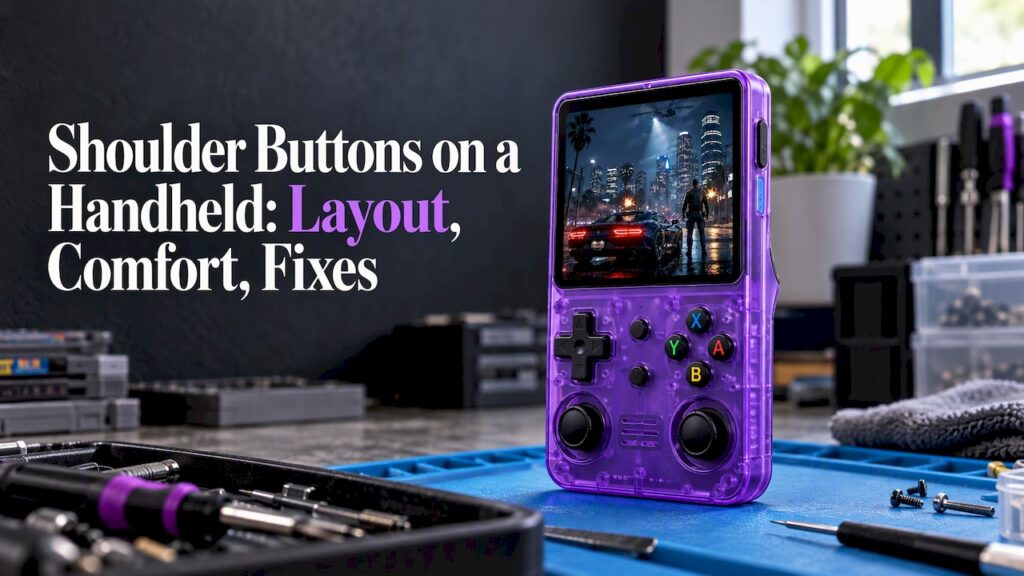
Shoulder buttons are the controls on the top edge of a handheld, pressed with your index or middle fingers. They handle the actions your thumbs can’t reach: aiming, braking, switching weapons, jumping higher. Their shape, height and travel decide whether a console feels comfortable for a two-hour session or tiring after twenty minutes. This guide covers what they do, how layouts differ, how to stop accidental presses, what replacing them involves and what to look for when you buy.
TL;DR
- Shoulder buttons (often labeled L and R, or L1/R1 and L2/R2) sit on the top corners and add extra actions that your face buttons can’t cover.
- Placement matters: recessed buttons are hard to hit by accident, while raised triggers are easier to reach but can tire your fingers.
- Accidental presses usually come from grip, sweat or dirt, or from a layout you can fix by remapping or cleaning.
- Replacing shoulder buttons is doable at home, but you need the right screwdrivers, patience and a check that the part fits your exact hardware version.
- When you shop, look for real, physical L/R buttons and a body shaped to fit your hands, not just a spec sheet.
Table of Contents
- What shoulder buttons do
- How layouts differ from handheld to handheld
- Grip, comfort and long sessions
- Stopping accidental presses
- Replacing or customizing shoulder buttons
- Choosing a handheld with shoulder buttons you’ll like
- How the Retro Pulse handles the controls
- Get a handheld that is ready to play
- Practical tips for living with shoulder buttons
- FAQ
- Sources
What shoulder buttons do
A shoulder button is any input located on the top edge of the device rather than on its face. On the Game Boy Advance, they sat at the top corners, and as one 2001 report on the console put it, they could trigger extra functions in games, such as new weapons or fancier jumps.
That description still holds. Across retro systems, shoulder buttons typically do one of four jobs:
- Action and combat: firing, blocking, charging an attack.
- Camera and aiming: rotating the view in 3D games, or locking onto a target.
- Driving and racing: acceleration and brake in games that use the top buttons instead of the face buttons.
- Menu navigation: flipping tabs, cycling inventory pages, skipping between items.
A handheld that plays many systems has to map all of these to one set of physical controls. The 16-bit era needed only two shoulder buttons (L and R). The PS1 and later systems used four (L1, R1, L2, R2). When one device emulates everything, it has to cover both cases without making either feel like an afterthought.
How layouts differ from handheld to handheld
Not all shoulder buttons are built the same way. The main differences are in height, shape and how many there are.
Two buttons versus four
Handhelds aimed at 8-bit and 16-bit games often have just L and R. Devices that cover PS1, N64 and arcade titles usually add a second row, so that L2 and R2 are available. How those second buttons are placed is where designs diverge.
Recessed versus raised
A review of one budget handheld described recessed R1 buttons at the edge and R2 triggers that protrude on top. This is a common compromise. The recessed button keeps the profile slim and stops pocket or bag pressure from setting it off. The protruding trigger is easy to find with a fingertip but sticks out and is easier to hit by accident.
Button shape and travel
Three details change how a shoulder button feels, even when two devices look similar:
- Travel: How far the button moves before it registers. Short travel is quick but easy to trigger unintentionally. Long travel is slower but more deliberate.
- Surface shape: A curved or slightly concave top gives your finger a place to rest. A flat, narrow edge makes you hunt for it.
- Click type: A tactile click tells you the press registered. A mushy button leaves you guessing, which hurts in rhythm and fighting games.
Grip, comfort and long sessions
Shoulder buttons shape your whole grip. Your index fingers have to sit on top, which means the device is supported by your palms and the backs of your other fingers. On a small, light handheld that works well. On a bigger one, it can feel unstable.
The same review noted that the shoulder buttons on that small budget device can feel cramped depending on the game, and that using the back triggers caused strain after about an hour. Two lessons follow:
- Cramped buttons matter more in some genres. A slow RPG that only uses L and R for menus is forgiving. A racer or shooter that keeps a finger on a trigger for long stretches is not.
- Strain is cumulative. If your fingers ache after an hour, the problem isn’t your hands. It’s the geometry of the device, and it’s worth taking breaks and loosening your grip.
Some practical comfort habits:
- Rest your index fingers lightly on the buttons rather than hovering over them, so your hands don’t tense.
- Let your palms carry the weight, not your fingertips.
- Stretch your hands between sessions, especially after long arcade or racing play.
- If you play on a commute, brace your elbows against your body instead of holding the device out in front of you.
Stopping accidental presses
Accidental shoulder presses fall into three groups: the grip, the environment and the settings.
Fix your grip
If you hit a shoulder button every time you pick up the device, you are probably gripping with your fingers curled over the top. Move your resting position so your fingers lie alongside the buttons rather than on them until you actually need them. It feels odd for a day and then becomes automatic.
Keep the buttons clean and dry
Some devices use touch-sensitive shoulder controls rather than mechanical ones. One manufacturer’s help page says that sweat, water, dirt and airflow can cause accidental activation. Its advice is to wipe the surface with a soft, dry cloth, avoid blowing or wind over it, and lower the touch sensitivity in the control settings. Mechanical buttons are less sensitive to this, but grit under a button can still cause sticking, so a quick wipe helps either way.
Remap the controls
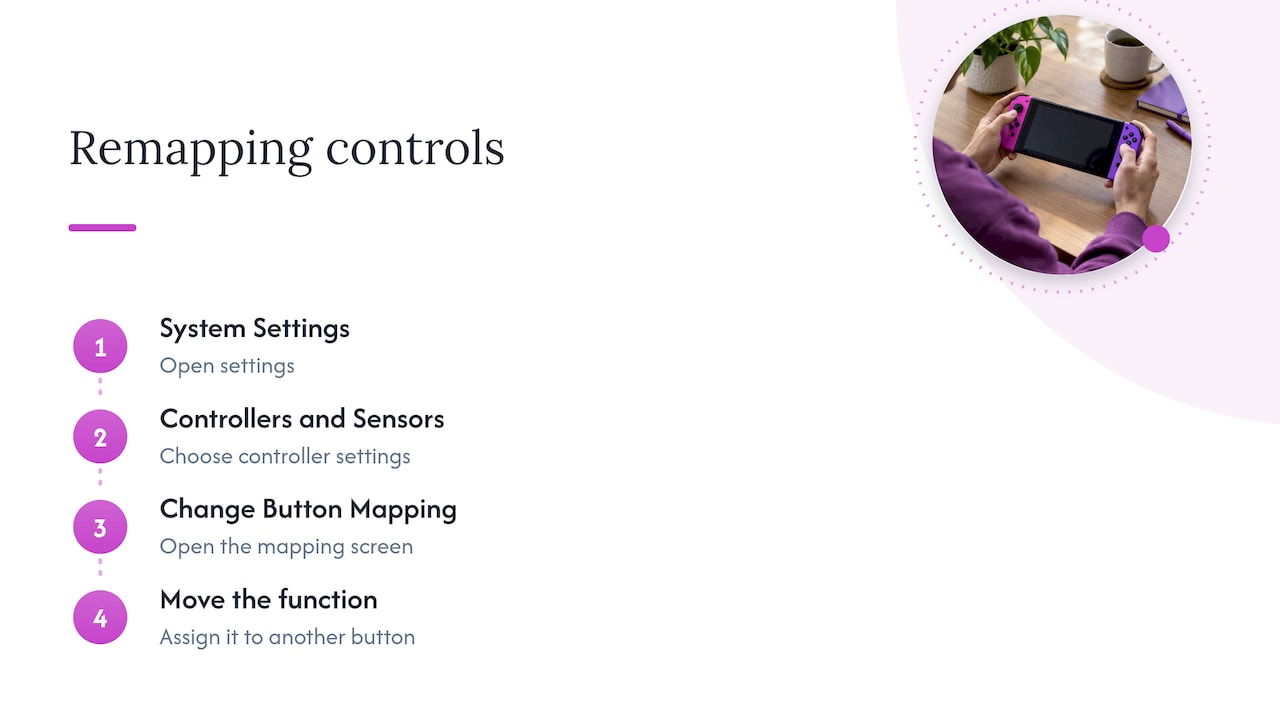
If the layout is the problem, remap it. On a current hybrid console, for example, you can reduce unwanted shoulder-button actions by opening System Settings, then Controllers and Sensors, then Change Button Mapping and moving the function to another button. Saved presets let you keep different layouts for different games or players. The accessibility group GameAccess notes that system-level remapping covers most gameplay buttons, which can also be disabled, while Home, Power, Volume and Sync cannot be changed.
On a retro handheld, the same idea applies at the emulator level. Many systems let you assign each original button to a different physical one, so a rarely used shoulder function can go to a less sensitive spot.
Replacing or customizing shoulder buttons
Worn, cracked or sticky shoulder buttons are a common reason people open up a handheld. It is a small repair, but it rewards preparation.
Tools and time
As a reference point, a repair guide for an older dual-screen handheld estimates 45 minutes to an hour for the shoulder-button job. It calls for Phillips and tri-wing screwdrivers and a spudger, and lists a Phillips #00 screwdriver at $5.49 and a spudger at $3.99. The procedure involves removing the battery cover and the lower case, and keeping track of tiny metal pegs and springs that can fly off or vanish.
Your device will be different, but the pattern holds:
- Screwdrivers that match the screw heads (often Phillips, sometimes Torx or tri-wing).
- A plastic pry tool or spudger, or even a guitar pick, to open the shell without gouging it.
- Tweezers for small parts.
- A small bowl or magnetic tray so screws don’t escape.
Typical risks
The real hazards are small plastic parts. Hinges and clips can snap when the shell is pried open, and springs can disappear into the carpet. Photograph each step as you go, so reassembly is a matter of retracing your work. Don’t force a clip. If something doesn’t move, look for a hidden screw under a sticker or foot.
Check fit before you buy
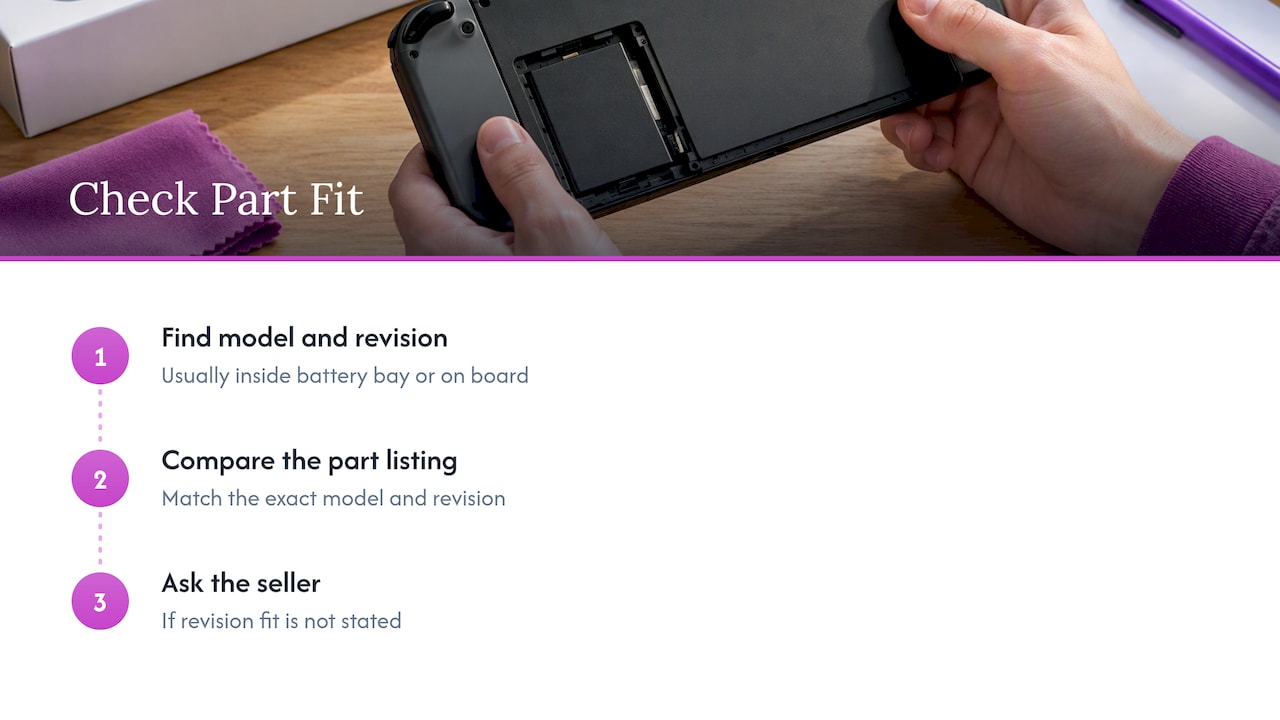
Replacement and upgrade parts are often made for a specific hardware revision. A common problem with aftermarket buttons is a design that doesn’t match the internals of a newer version of the same device, which can press on or damage parts inside. Before ordering, find the exact model and revision, usually printed inside the battery bay or on the board, and compare it against the part listing. If the listing doesn’t say it fits your revision, ask the seller.
Also weigh what a swap will really change. Taller or better-shaped buttons can improve reach and comfort, and better switches can improve feel, but a button swap won’t fix a shell that is simply too small for your hands.
Choosing a handheld with shoulder buttons you’ll like
When you are buying rather than repairing, the shoulder buttons are one of the most important things to judge, and one of the hardest to judge from a product photo. Use this checklist:
| What to check | Why it matters |
|---|---|
| Physical L and R buttons | Touch or on-screen substitutes lack feedback, and they misfire with sweat and dust |
| Enough buttons for your library | Systems like the PS1 and N64 use extra top controls |
| Shape of the body | A grip that fits your palm reduces strain on your fingers |
| Recessed or protruding | Recessed resists pocket presses, protruding is easier to reach |
| Click feel | Tactile clicks help in fast games |
| Battery and shell access | A removable battery and a simple build make repairs less daunting |
| Warranty and returns | A fit problem is easier to solve when you can return the device |
The last row is easy to overlook. Ergonomics are personal. A device that is perfect for one person’s hands is awkward for another’s, so a clear return window is a real feature, not fine print.
If you are also weighing controls beyond the shoulders, our comparison of D-pad versus analog stick on one handheld and our overview of dual-analog handhelds for N64 and PSP games cover the rest of the layout. If you are shopping for a child or a first-time player, the retro handheld comparison for parents walks through what matters most.
How the Retro Pulse handles the controls
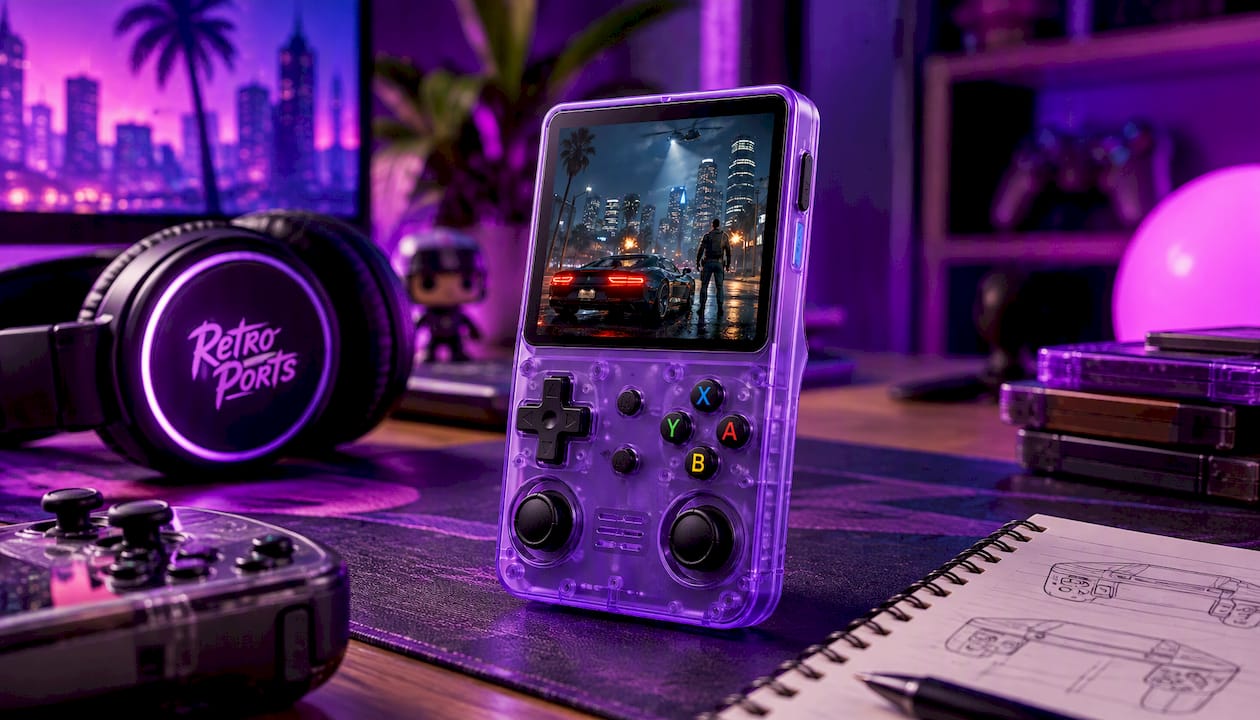
The Retro Pulse is built around a real physical control set: a D-pad, twin sticks and L/R triggers, so the games that depend on top buttons have something to press. It carries a 3.5" IPS display, a removable battery rated for 6 to 8 hours, USB-C charging and dual microSD slots. The library is preloaded with 15,000 games from over 20 systems, including NES, SNES, Genesis, PS1, N64, Game Boy, GBA and arcade, so you can start playing without setup, downloads or subscriptions.
Our view on shoulder buttons
Most people never think about shoulder buttons until they hurt or misfire. We think they deserve attention before you buy, because a handheld with 15,000 games is only as good as your ability to hold it comfortably and press what you mean to press.
That is why the Retro Pulse uses real physical controls, with a D-pad, twin sticks and L/R triggers, instead of leaving the top-edge actions to touch input. Games from the Game Boy Advance, PS1 and N64 era were designed around those buttons, and a library this size should be playable the way it was meant to be.
We also ship from a U.S. warehouse, back the console with a one-year warranty and offer 30-day returns. For something as personal as grip, we think a fair return window matters as much as any spec. Pick it up, play a few games, and see whether your hands agree.
Sean
Get a handheld that is ready to play
If you want physical shoulder buttons, a removable battery and a library that works from the first boot, take a look at the Retro Pulse. It comes preloaded, works offline, and is covered by a one-year warranty and 30-day returns.
You can also browse the full handheld range to see what else is available.
Practical tips for living with shoulder buttons
A few habits make a difference whatever device you own:
- Test before a long session. Open a game that uses L and R heavily and play for ten minutes. If your fingers cramp, adjust your grip before settling in.
- Remap on purpose. If a game puts a frequent action on a hard-to-reach trigger, move it. Most emulators and systems allow it.
- Store the device carefully. A case or sleeve keeps the top edge from being pressed in a bag.
- Clean occasionally. A dry, soft cloth removes the oils and grit that cause sticking.
- Plan repairs. If you decide to open the case, set aside an hour, use the right screwdrivers and keep every screw in a tray.
FAQ
What are shoulder buttons on a handheld?
They are the controls on the top edge or corners of the device, pressed with your index or middle fingers. They add extra actions such as aiming, braking, switching weapons or turning pages in a menu. Many handhelds label them L and R, and some add L2 and R2.
Why do my fingers hurt when I use the shoulder buttons?
Usually it is a mix of grip tension and device shape. Reviewers have reported strain from back triggers after about an hour on small handhelds. Relax your grip, let your palms support the weight, take breaks and try a different resting position for your fingers. If pain continues, see a doctor or physical therapist.
How do I stop pressing the shoulder buttons by accident?
Rest your fingers beside the buttons until you need them, keep the surface clean and dry, and remap the function if a button sits in the wrong place. For touch-sensitive controls, reducing sensitivity in the settings also helps.
Can I replace the shoulder buttons myself?
Often yes. Expect to need the right screwdrivers, a pry tool, tweezers and about an hour. Check that the replacement part fits your exact model and hardware revision before you buy, and keep track of small springs and pegs as you work.
Does the Retro Pulse have shoulder buttons?
Yes. It has physical L/R triggers alongside a D-pad and twin sticks, so games that use the top buttons can be played with real controls.
Sources
- Game Boy, at 12, Gets Broad Shoulders (The New York Times, 2001)
- Budget handheld review (GamesRadar, 2024)
- How do I prevent accidental shoulder button triggers?
- How to Remap Your Controls (GameAccess)
- How to Remap Your Controller (MakeUseOf, 2022)
- Shoulder Buttons Replacement guide (iFixit, 2025)