Start with the quick fixes: open your system settings or quick menu and raise the brightness level, turn off power-saving mode, and disable any shader or overlay that’s darkening the image. Plug into AC power or a power bank if you need the screen at its brightest for a while. If you’re shopping for a device that gets this right out of the box, a handheld with an IPS display, like our Retro Pulse, gives you strong visibility without any tinkering.
TL;DR:
- Check the operating system and emulator separately: RetroArch shaders, overlays, or color profiles can darken games even when the system slider is maxed.
- If brightness rises only when charging, the firmware may cap output on battery; use AC power or a power bank for extended bright sessions.
- Reduce direct glare by moving into shade or changing the device angle; matte protectors can help outdoors but may soften fine details on small screens.
- Try software, power, and lighting checks before modifying hardware, since screen swaps can void warranties, damage connectors, and leave an upgraded panel too bright indoors.
Table of Contents
- How to change brightness in system menus and quick settings
- Shaders, overlays, and software filters change what you think is a brightness problem
- Ambient light, glare, and positioning tricks to improve visibility
- Power, battery life, and brightness: understanding the trade-offs
- Hardware adjustments and safe upgrades: what modding or screen swaps can realistically do
- Troubleshooting checklist: if brightness still seems low
- Publisher perspective: how Retro Pulse handles brightness in practice
- My presets for different lighting situations
- Why Retro Pulse is worth considering if you want brightness handled for you
- FAQ
- Sources
How to change brightness in system menus and quick settings
Almost every retro handheld, whether it runs stock firmware, a custom Linux build, or an Android skin, buries brightness control in one of three places: a quick menu you pull up with a button combo, the main system settings, or an in-emulator overlay. RetroArch, the emulator frontend found on countless handhelds, has its own quick menu accessible mid-game that includes display options separate from whatever the operating system offers. If raising brightness in the OS doesn’t change what you see in a game, you may actually be fighting a shader or filter layered on top, which the next section covers.
Power-saving modes complicate this more than people expect. Nintendo’s own support documentation for the 3DS family explains that the system has a dedicated power-saving mode that automatically alters brightness to conserve battery, separate from the manual brightness slider, and that plugging into AC power can raise the maximum brightness ceiling when you’ve set the level high. That pattern, a software cap that only lifts when you’re on external power, shows up on other handhelds too, so if your screen seems dimmer than the slider suggests, check your power source before assuming something’s broken.
Here’s a sequence that works across most devices:
- Open the quick menu or settings panel (usually a shoulder button plus a face button, or a dedicated menu button).
- Find the brightness or display submenu and push the level up to see your actual ceiling.
- Turn off power-saving or eco mode if one exists.
- Plug into AC power or a power bank and recheck the maximum brightness, since some devices raise the ceiling only when charging.
- If you’re in an emulator, open its own quick menu and check for a separate brightness, gamma, or overlay setting that overrides the system display.
- Back out and test in an actual game, not just the settings screen, since some menus preview brightness incorrectly.
Firmware varies enough that menu wording and button combos differ by manufacturer and even by firmware version on the same device. When in doubt, check the printed manual or the manufacturer’s support site rather than guessing, since some devices hide brightness inside a “display” tab and others fold it into “power” settings entirely.
Shaders, overlays, and software filters change what you think is a brightness problem
Before you touch any hardware or assume your panel is weak, rule out shaders. CRT shaders, scanline overlays, and grid filters are popular on retro handhelds because they mimic the look of old tube televisions, but they do this by darkening pixels in a pattern, which lowers the overall light output of the image even if your brightness slider is maxed out. A screen that looks dim with a heavy CRT shader can look noticeably brighter the moment you switch to a flat, unfiltered output.
Most frontends put shader controls in a predictable place:
- RetroArch: quick menu, then “Shaders,” where you can disable the current shader entirely or adjust its parameters if it exposes brightness or contrast sliders.
- Skin-based launchers: often a “video” or “display” tab inside per-emulator settings rather than a global menu.
- Standalone emulators: look for “filters,” “overlays,” or “video enhancements” in their settings screen.
A simple diagnostic sequence saves a lot of guessing. Turn the shader off completely and see if the image brightens. Then switch to a neutral color profile if your device offers one, since “warm” or “vivid” presets can shift perceived brightness even without changing the actual backlight level. From there, adjust the real brightness setting and judge the result against a game you know well, since a title with naturally dark scenes will always look dimmer than one with bright, saturated art regardless of your settings.
Color correction matters here too. Reviewer testing on modern backlit handhelds found that color-correction and brightness menus materially change how usable a screen feels depending on lighting and use case, which suggests the fix for a washed-out or murky image is sometimes a color profile change rather than a raw brightness increase. If a game looks flat and gray rather than simply dark, try adjusting saturation or contrast before cranking brightness higher, since that often restores detail without draining your battery as fast.
Pro Tip: Save a “clean” display profile with shaders off and neutral color as your default, then switch to a CRT shader only for games designed around that aesthetic, rather than leaving a heavy filter on all the time.
Ambient light, glare, and positioning tricks to improve visibility
Sometimes the screen is fine and the room is the problem. Direct sunlight, overhead glare, and reflective surfaces behind you can wash out even a bright panel, and no amount of brightness adjustment fully compensates for light bouncing straight into your eyes off the glass. Guides on screen setup for retro gaming consistently point out that ambient light and glare affect perceived image quality more than raw brightness or contrast settings, which means a few minutes repositioning yourself can outperform a trip into the settings menu entirely.
A few low-effort tactics handle most situations, like moving into shade or turning your back to a window instead of facing it, since cutting direct light hitting the screen helps visibility more than raising brightness.
- Tilt the device slightly to change the reflection angle rather than fighting glare head-on.
- Cup a hand or use a small hood or cap brim to block overhead sun when you’re stuck outdoors.
- Add a dim bias light behind your screen for indoor evening play, which reduces the contrast between a bright panel and a dark room and eases eye strain.
- Test the same game outdoors in full sun, indoors under a lamp, and in a dark room to see where your current settings actually struggle.
Anti-glare screen protectors help in bright outdoor settings by scattering reflected light, but they come with a trade-off: some diffuse the image enough to soften fine detail, which matters more on a small handheld screen than on a laptop or monitor. If you’re playing primarily indoors, a glossy protector or no protector at all usually preserves sharper visuals, saving the matte anti-glare option for devices that spend a lot of time outside.
Power, battery life, and brightness: understanding the trade-offs
Every extra notch of brightness pulls more power from your battery, and that trade-off has been true since the earliest backlit handhelds. The Game Boy Advance SP’s integrated screen light was a selling point at launch, and Nintendo documented at the time that turning the light on increased visibility but shortened battery life, a relationship that still governs every backlit or OLED handheld sold today.
The trade-off in practice: the 3DS manual documents that raising brightness shortens battery life and that power-saving mode automatically dims the screen to conserve power, which is why so many handhelds ship with power-saving enabled by default even though it caps how bright the screen can get.
If you need maximum brightness for an extended session, outdoor play, or recording gameplay footage, plug into a power bank rather than relying on the battery alone. That sidesteps the usual choice between visibility and runtime entirely, since you’re not drawing down a finite charge while running the screen at its brightest setting. For shorter sessions where battery life matters more than peak brightness, flipping power-saving back on and accepting a dimmer screen indoors is often the better call, especially since indoor lighting rarely demands full brightness anyway.
One sign that your brightness is being artificially capped: the screen gets noticeably brighter the moment you plug in, even though you didn’t touch the settings. That’s the firmware enforcing a lower ceiling on battery power, not a hardware limitation, and it’s worth knowing before you assume your panel simply isn’t bright enough.
Hardware adjustments and safe upgrades: what modding or screen swaps can realistically do
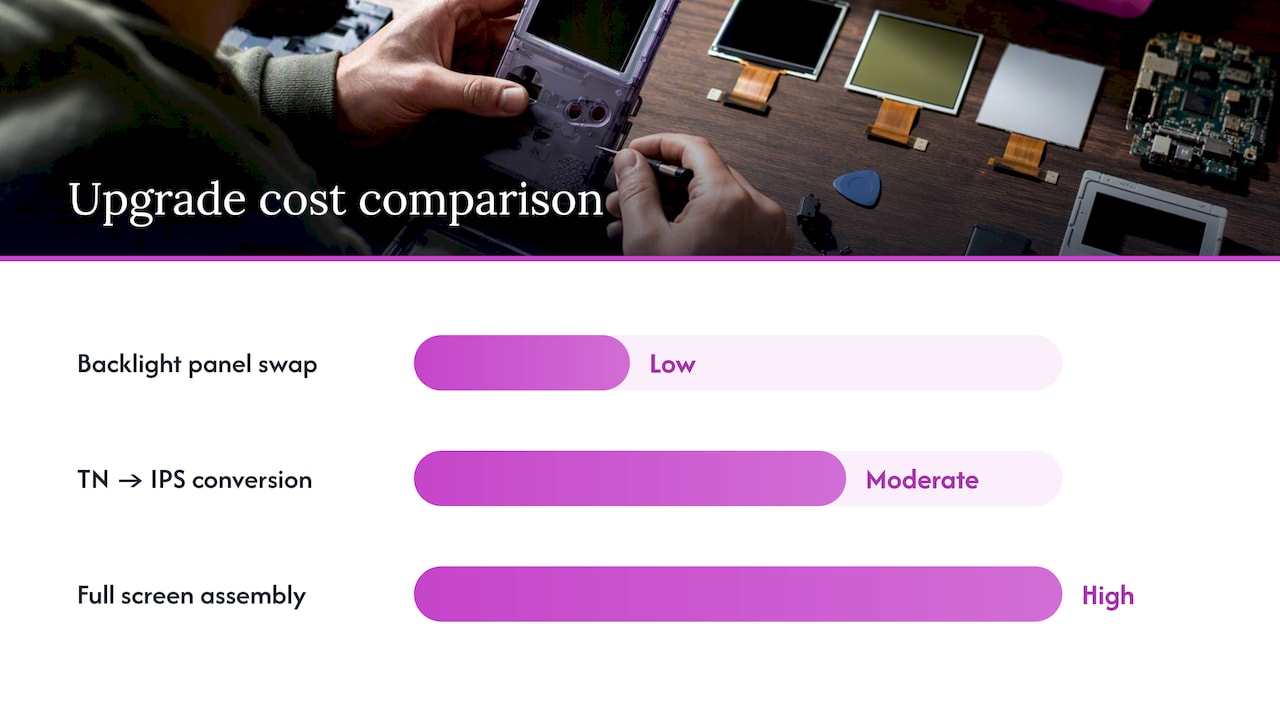
When software and positioning don’t get you where you need to be, the next step is hardware, but this is where risk and cost both climb fast. The realistic options are a brighter backlight panel, swapping the screen’s underlying tech from TN to IPS, or replacing the entire screen assembly with a higher-output unit.
- Backlight panel swaps increase raw brightness on devices with dim stock LEDs, but they also increase battery draw and sometimes introduce uneven lighting if the new panel isn’t a precise match.
- TN to IPS conversions improve viewing angles and color consistency alongside brightness, since IPS panels hold their color and contrast much better off-axis than older TN tech.
- Full screen assembly replacements solve both brightness and viewing-angle problems at once but cost the most and carry the highest risk of damaging ribbon cables or connectors during installation.
Every one of these routes risks voiding your warranty, and a botched install can leave you with a cracked screen, a loose connector, or a device that no longer powers on. Reviewer testing on backlit handheld panels has also found that even a genuinely bright IPS screen can be uncomfortably bright indoors at night, so a hardware upgrade aimed purely at raising output can create its own problem if the device lacks a wide enough brightness range to dim back down.
Pro Tip: Try every software fix first. Modding only makes sense once you’ve confirmed the stock panel itself, not a shader, power-saving setting, or glare issue, is the actual limitation.
The decision tree is straightforward: exhaust the free fixes, then weigh the mod against the age and value of your device. An older handheld you’ve had for years might be worth a backlight upgrade since replacement parts are cheap and the repair community has mature guides. A newer device still under warranty is usually better served by returning it or buying a model with a brighter panel from the start, since the mod risk outweighs the marginal brightness gain.
Troubleshooting checklist: if brightness still seems low
If you’ve adjusted settings and the screen still feels dim, work through this in order rather than jumping straight to “the hardware is broken.”
- Check your battery percentage and whether you’re on AC power, since several handhelds cap maximum brightness below a certain charge level.
- Confirm power-saving mode is actually off, not just toggled in one menu while a second setting overrides it.
- Reopen the brightness slider and push it to its actual maximum, since some menus default to a mid-range preview.
- Check for an active shader, overlay, or color profile that might be darkening the image independent of the brightness setting.
- Update your firmware, since display bugs tied to specific firmware versions are more common than most people expect.
- Test the same brightness setting on a different game or a different input, like a video file, to isolate whether the problem follows the content or the device.
If none of that resolves it, look for physical signs of a hardware fault: uneven lighting across the panel, flickering at certain brightness levels, or visible discoloration in one corner. Those point to a failing backlight or a loose connector rather than a settings problem, and pushing the brightness slider further won’t fix it.
At that point, contact the device’s vendor or support channel rather than attempting a repair blind. Have your firmware version, the exact symptom (flicker, uneven brightness, a dark patch), and whether the issue appears on battery, AC power, or both ready to describe, since that detail speeds up any support conversation and helps rule out a simple software fix before you consider a repair or replacement.
Publisher perspective: how Retro Pulse handles brightness in practice
We built Retro Pulse around a 3.5" IPS display specifically because IPS panels hold consistent brightness and color across wide viewing angles, which matters more than peak brightness alone when you’re playing at an angle on a couch or a commute. A TN panel looks fine head-on and washes out the moment you tilt it. IPS doesn’t have that problem, which is why we didn’t cut corners on panel type even though it costs more than the cheaper alternative.
We also paired that display with a removable battery, so you can carry a spare and run the screen brighter for longer outdoor sessions without rationing charge the way you would on some sealed-battery devices. Because the device runs offline-first with its library preloaded, there’s no background network activity competing for battery, which means more of that charge goes toward the screen itself when you want it bright.
Units ship with a warranty, so if a panel ever underperforms what is described, customers are not stuck troubleshooting a shipping delay or a warranty process routed through an overseas seller. For anyone who read through the mod section above and decided that’s more risk than they want to take on, that warranty and return path is the lower-risk alternative to swapping a backlight yourself.
My presets for different lighting situations
I keep three rough presets in my head rather than fiddling with settings every time the light changes. Outdoors in daylight, brightness goes to maximum, power-saving comes off, and I’ll duck into shade if the glare is bad rather than pushing the screen any brighter than it needs to be. Indoors during the day, I drop to a moderate level and add a small lamp behind the screen, which cuts eye strain more than people expect. At night, brightness goes way down, and I’ll switch to a warmer color profile if the device offers one, since a blazing white screen in a dark room is rough on your eyes and your sleep. None of this requires memorizing numbers, just recognizing which of the three situations you’re actually in before you start adjusting sliders.
— Sean
Why Retro Pulse is worth considering if you want brightness handled for you
If everything above sounds like more troubleshooting than you want to do, buying a handheld built around visibility from the start is the simpler route. Such a device pairs a vibrant 3.5" IPS display with a removable battery, so you get strong daylight readability and the option to carry a spare for longer bright-screen sessions, without opening the case or touching a shader menu.
A few things worth checking before you decide:
- The product page lists full specs, including display size and battery details, if you want to compare against your current device.
- A one-year warranty and 30-day return window cover you if the unit doesn’t match what we describe.
- The handheld lineup shows how Retro Pulse fits alongside everything else we offer if you’re weighing more than one option.
If a mod or a backlight swap felt like too much risk for the brightness gain, this is the alternative: a device already tuned for the problem you’re trying to solve.
FAQ
Can I adjust the brightness of my projector?
Most projectors have a dedicated brightness or lamp mode setting in their on-screen menu, separate from a connected handheld’s own display settings. Check your projector’s remote or menu button for a “picture” or “lamp” submenu, since the exact wording varies by brand and model.
Can you turn up the brightness on a Game Boy Advance?
The original Game Boy Advance has no backlight and no brightness control, so visibility depends entirely on ambient light. The Game Boy Advance SP that followed added an integrated screen light you could switch on for better visibility, though doing so reduces battery life.
Can you adjust screen brightness on a 3DS?
Yes, the 3DS family has a brightness slider accessible through the system’s home menu or quick settings, plus a separate power-saving mode that automatically dims the screen. Nintendo’s support documentation confirms that plugging into AC power raises the maximum brightness ceiling when the level is set high.
Why is my brightness so low even at full brightness?
An active shader, overlay, or color profile is a common culprit, since these darken the image independent of the brightness setting. Power-saving mode or a low battery charge can also cap the maximum brightness your device will allow until you plug into AC power or a power bank.
Does running a handheld at full brightness drain the battery faster?
Yes, higher brightness increases power draw on every backlit handheld, a trade-off that’s held true since the Game Boy Advance SP’s screen light. Using a power bank during extended outdoor sessions lets you keep the screen bright without worrying about your battery running out mid-session.